This integration is certified by Stitch. For support, contact Stitch support.
Google ECommerce feature snapshot
A high-level look at Stitch's Google ECommerce integration, including release status, useful links, and the features supported in Stitch.
| STITCH | |||
| Release Status |
Released |
Supported By | |
| Stitch Plan |
Free |
||
| DATA SELECTION | |||
| Table Selection |
Unsupported |
Column Selection |
Unsupported |
| REPLICATION SETTINGS | |||
| Anchor Scheduling |
Unsupported |
Advanced Scheduling |
Unsupported |
| Table-level Reset |
Unsupported |
Configurable Replication Methods |
Unsupported |
| TRANSPARENCY | |||
| Extraction Logs |
Unsupported |
Loading Reports |
Supported |
Connecting Google ECommerce
Connecting your Google ECcommerce data to Stitch is a three-step process:
- Add Google ECcommerce as a Stitch data source
- Authorize Stitch & select a Google Analytics profile
- Define the Replication Frequency
Prerequisites
Before you get started, you should verify that:
-
The user creating the integration has at least Read & Analyze permissions and that there’s data in the account. If the profile you use to connect doesn’t have these permissions (or there’s no data in the account), you’ll receive an error message like this:
“Something went wrong. None of the Google Analytics profiles associated with the credentials you’ve supplied contain data that Stitch can access. Please make sure that the credentials you’ve supplied have appropriate access.”
- All ad-blocking software you are currently using is paused. Because Google authentication uses pop ups, you may encounter issues if ad blockers aren’t disabled during the setup.
- Your account has the Enable ECommerce setting turned on. If you have ECommerce data in your accuont, this setting is already enabled and you can move on.
Add Google ECommerce as a Stitch data source
- Sign into your Stitch account.
-
On the Stitch Dashboard page, click the Add Integration button.
-
Click the Google ECommerce icon.
- Click Sign in with Google Analytics.
Authorizing Stitch & Selecting a Google Analytics Profile
- Next, you’ll be prompted to log into your Google account and to approve Stitch’s access to your Google ECommerce data. Note that we will only ever read your data.
- Click Allow to continue.
-
After your credentials are validated, you’ll be prompted to select the Google Analytics profile you want to connect to Stitch:
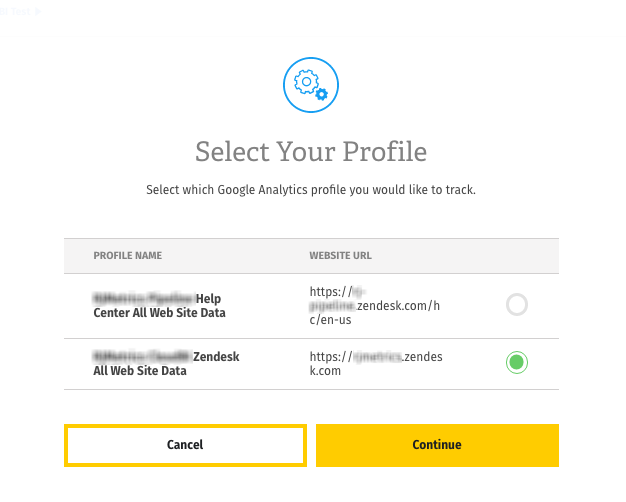
Remember: profiles need to have Read & Analyze permissions to be detected by Stitch. If you don’t see the profile you want in this list, we recommend that you double-check the permission settings.
- When finished, click Continue to save the integration and complete the setup.
Create a replication schedule
In the Replication Frequency section, you’ll create the integration’s replication schedule. An integration’s replication schedule determines how often Stitch runs a replication job, and the time that job begins.
Google ECommerce integrations support the following replication scheduling methods:
To keep your row usage low, consider setting the integration to replicate less frequently. See the Understanding and Reducing Your Row Usage guide for tips on reducing your usage.
Initial and historical replication jobs
After you finish setting up Google ECommerce, its Sync Status may show as Pending on either the Stitch Dashboard or in the Integration Details page.
For a new integration, a Pending status indicates that Stitch is in the process of scheduling the initial replication job for the integration. This may take some time to complete.
Initial replication jobs with Anchor Scheduling
If using Anchor Scheduling, an initial replication job may not kick off immediately. This depends on the selected Replication Frequency and Anchor Time. Refer to the Anchor Scheduling documentation for more information.
Free historical data loads
The first seven days of replication, beginning when data is first replicated, are free. Rows replicated from the new integration during this time won’t count towards your quota. Stitch offers this as a way of testing new integrations, measuring usage, and ensuring historical data volumes don’t quickly consume your quota.
Replicating Google ECommerce Data
Every time Stitch runs a replication job for Google ECommerce, the last 15 days’ worth of data will be replicated.
This is applicable to all tables in the integration.
Stitch replicates data in this way to account for updates made to existing records within the default attribution window of 15 days, thus ensuring you won’t make decisions based on stale (or false) data. As a result, you may see a higher number of replicated rows than what’s being generated in Google ECommerce.
Setting the Replication Frequency to a higher frequency - like 30 minutes - can result in re-replicating recent data and contribute to greater row usage. Selecting a lower frequency can help keep your row count low.
Google ECommerce Schema
After the first successful sync of your Google ECommerce data, you’ll see a single table in your data warehouse. The table follows this naming convention:
ecommerce[GA profile id]_integration version
Here’s an example: ecommerce123456789_v2. In this case, the profile ID is 123456789 and the version of the ECommerce integration is 2.
In the section below, you’ll find a list of the attributes in this table, a brief description, and links to Google’s more in-depth documentation.
ecommerce123456789_v2
Replication Method: Key-based Incremental
Primary Key: id
Contains Nested Structures?:
No
ecommerce123456789_v2 table contains your Google ECommerce data.Replication & Attribution Windows
Every time a replication job runs for Google ECommerce, the past 15 days' worth of data will be replicated for this table. As a result, you may see a higher number of replicated rows than what's being generated in Google ECommerce.
Stitch replicates data in this way to account for updates made to existing records within Google ECommerce's default attribution window, thus ensuring you won't make decisions based on stale (or false) data.
ecommerce123456789_v2 Attributes
This table will contain the following attributes. For more info, click the links to check out Google’s documentation.
ID (
id) - This column is a unique identifier generated during replication.accountid - This column contains the account ID associated with your Google Analytics ECommerce account.
campaign - This column contains the campaign name (utm_campaign)
keyword - This column contains the keyword description (utm_term)
medium - This column contains the medium name (utm_medium)
profileid - This column contains your Google Analytics profile ID.
profilename - This column contains your Google Analytics profile name.
socialnetwork - This column contains the name of the social network (e.g. Facebook, YouTube, etc.)
source - This column contains the name of the order source. (utm_source)
transactionid - This column contains the order ID, which you can use to join the referral data back to your orders data. You can refer to Google’s documentation if you need some background on tracking setup and management.
transactions - This column contains the total number of transactions.
| Related | Troubleshooting |
Questions? Feedback?
Did this article help? If you have questions or feedback, feel free to submit a pull request with your suggestions, open an issue on GitHub, or reach out to us.